Thursday, November 20, 2014
New bread recipe from Julie's ward cookbook
I don't have time to add this but wanted to mention so I remember that I liked it. It was a sweeter bread and perfect consistency. I will make again. I didn't use any gluten or dough conditioner. pg 152
Chicken Tiki Masala
I just made my favorite plate of Indian ever!! So good! I got it from Julie's ward cookbook from Megan Williams. Just some notes so I don't forget for next time. I didn't add garam masala (I don't think they sell that at a grocery store), used 3 chicken breasts, didn't use a jalapeno but one anaheim chili pepper, and ate it with hummus, rice/quinoa mixture from Costco, and nann bread (ours was actually pita but it was close enough) So so good!!

Stuffed Enchilad Zucchini Boats
I liked this recipe. However I kind of just did it in my own way to make it easier for me. This is what I did:
I used banana squash instead of zucchini because that's what I had. It was good. I put a little water in the bottom of a baking dish (9x13 Pan), then cut the banana squash into strips, put them face up in the pan, dotted them with butter, sprinkled with salt and pepper, covered with foil and cooked at 400 for about 40 min or until tender when pricked with fork. While the squash cooked I cooked the meat etc. While I was cooking the meat I just added the rest of the ingredients into the pan with it besides the tomato sauce, beans, cheese, and cilantro. (I never added the coriander because I didn't have any). When the meat was done I added the tomato sauce and then simmered for 5 min. After simmering, I added the beans. I poured the mixture on the top of the squash and sprinkled with cheese and cilantro. It was like a healthy Navajo taco. The mixture tasted a lot like chili. I have to warn and I repeat this WARNING...When I added the salt it seemed like a lot so I only added half and it still seemed a little salty. I added less chili powder and cumin too and it was pretty spicy with less. Beware and add to taste during the seasoning steps.
These are the ingredients:
Ingredients
- 4 medium zucchini, halved
- 8-12 ounces lean ground turkey or ground beef (depends on how meaty you want this dish to be)
- 1 teaspoon salt
- 1/2 teaspoon black pepper
- 1/2 cup finely chopped onion
- 2 cloves garlic, finely minced or pressed
- 1 jalapeno, finely chopped (seeds and membrane removed if you want less heat)
- 16 ounces tomato sauce
- 1 tablespoon chili powder
- 2 teaspoons ground cumin
- 1 teaspoon granulated sugar
- 1 teaspoon dried oregano
- 1/2 teaspoon ground coriander
- 15-ounce can pinto beans, rinsed and drained
- 1-2 cups shredded Monterey Jack or cheddar cheese (or a combination)
- Chopped cilantro for garnish
Wednesday, October 29, 2014
Navajo Tacos
We made these again last night for part of our fall meals before Halloween. They are always a hit when we make them so I wanted to write this down so I didn't forget this meal idea.
The recipe I use for the scone dough is the same recipe for dinner rolls from the Betty Crocker Cookbook. I think it is the secret to making them tasty and fluffy. I substitute 1/2 of the flour with wheat. I just mix the ingredients, skip the raising, and use my little tortilla press to make them into scones. It makes it so easy that way! We usually fry them in olive oil but this time we tried coconut oil and were happy because the smoking point seemed better and we liked the taste. The only thing with coconut oil was the color turned blackish by the end so I was worried that it had turned carcinogenic? We dumped it in case at the end but I am going to try coconut oil the next time and then I'll have to report. Just a note on the oil though: We usually put the oil in a glass tupperware and store it in the fridge after we use it. We reuse it a couple of times in frying scones before we dump it. I was reading online though that if the oil smells like a greasy burger joint then you should dump it. Good to know because ours did when I opened it up and so I dumped it. We topped these with canned chili (sometimes we have just done refried beans), cheese, salsa, chopped green peppers, and chopped olives. We usually do lettuce too but skipped it last night.
The recipe I use for the scone dough is the same recipe for dinner rolls from the Betty Crocker Cookbook. I think it is the secret to making them tasty and fluffy. I substitute 1/2 of the flour with wheat. I just mix the ingredients, skip the raising, and use my little tortilla press to make them into scones. It makes it so easy that way! We usually fry them in olive oil but this time we tried coconut oil and were happy because the smoking point seemed better and we liked the taste. The only thing with coconut oil was the color turned blackish by the end so I was worried that it had turned carcinogenic? We dumped it in case at the end but I am going to try coconut oil the next time and then I'll have to report. Just a note on the oil though: We usually put the oil in a glass tupperware and store it in the fridge after we use it. We reuse it a couple of times in frying scones before we dump it. I was reading online though that if the oil smells like a greasy burger joint then you should dump it. Good to know because ours did when I opened it up and so I dumped it. We topped these with canned chili (sometimes we have just done refried beans), cheese, salsa, chopped green peppers, and chopped olives. We usually do lettuce too but skipped it last night.
Tuesday, September 30, 2014
Whole Wheat Cinnamon Twists
I was waiting for my usual homemade wheat bread loaves to rise when I got a craving for a treat. Right before it was supposed to go in the oven, I snagged a loaf that was rising. rolled it out on a cookie sheet, brushed it with butter, sprinkled it very generously with cinnamon sugar, cut it into strips with a butter knife, rolled it into a twist, brushed it with butter a second time, sprinkled it again with cinnamon sugar, and put it in the oven at 350. I can't remember how long...20 min?? They were so good!! I'll have to add my recipe for the bread. It's the one from Marcie Mcphee but without the dough enhancer and gluten.
Thursday, September 11, 2014
pumpkin dip
http://aspottedpony.com/recipies/pumpkin-dip-a-great-fall-party-food/1587/
I took dinner to someone and needed a quick and easy treat so I tried this. We really liked this and ate it with apples and nilla wafers.
I took dinner to someone and needed a quick and easy treat so I tried this. We really liked this and ate it with apples and nilla wafers.
Wednesday, September 10, 2014
Funfetti Cake
http://sallysbakingaddiction.com/2013/03/19/easy-homemade-funfetti-cake/
I made this for Lucy s birthday and we liked it a lot. I thought about 2 T of sprinkles was plenty for the cake. I didn't msje the frosting but wish I had.
I made this for Lucy s birthday and we liked it a lot. I thought about 2 T of sprinkles was plenty for the cake. I didn't msje the frosting but wish I had.
Monday, August 18, 2014
Baked Brown Rice
Tried it. Loved it. Easy. I didn't have to clean a sticky rice pan. Going to make again!
Baked Brown Rice

Note: This recipe doubles beautifully for a 9X13-inch pan.
Ingredients
- 1 1/2 cups brown rice
- 2 1/2 cups low-sodium chicken broth or water (if using water, add 1 teaspoon salt) I used chicken broth and loved the flavor.
Directions
- Preheat the oven to 350 degrees. Lightly grease an 8X8-inch or 9X9-inch baking pan. Place the rice in the prepared pan and pour in the liquid. Stir to equally distribute the rice. Cover tightly with a double layer of aluminum foil and bake for 1 hour and 10 minutes.
- Remove from the oven and let sit for five minutes before removing the aluminum foil and fluffing with a fork. If your rice still has a bit of liquid on the bottom or conversely, if it is dried out, adjust the baking time up or down to make changes.
Notes
Variations: Before baking, slice one small yellow onion into dices or half moons and caramelize and brown in 1 teaspoon of olive oil until golden and soft (about 10 minutes in a nonstick skillet). Stir onion into rice and broth mixture and bake according to recipe.
After removing rice from the oven and letting it sit for five minutes, remove aluminum foil and stir in the zest and juice from 1 lemon, 1/2 cup grated fresh Parmesan cheese, 1 tablespoon sugar and 1/2 apple, finely diced.
Printed from Mel\'s Kitchen Cafe (www.melskitchencafe.com)
Recipe Source: my friend Jennifer S. http://www.melskitchencafe.com/baked-brown-rice/
Sunday, August 17, 2014
cinnamon waffles
http://m.allrecipes.com/recipe/220191/carols-cinnamon-waffles
I love these. I changed it a little when I made them to 1/2 whole wheat, used almond milk, and used coconut oil. I love that these have sugar in them to make them sweet so I don't need syrup.
Add to list
Directions
- Whisk flour, white sugar, brown sugar, cinnamon, baking powder, and salt together in a bowl until no lumps remain.
- Pour milk, vegetable oil, and vanilla extract into the flour mixture; stir until just combined.
- Beat egg whites until foamy in a large glass or metal mixing bowl until soft peaks form. Lift your beater or whisk straight up: the egg whites will form soft mounds rather than a sharp peak.
- Fold the the beaten egg whites into the batter.
- Preheat a waffle iron and coat with cooking spray.
- Pour batter onto waffle iron in batches and cook until crisp and golden brown, about 2 minutes; repeat until all batter is used.
- All done! Now take a photo, rate it, and share your accomplishments!
Sunday, August 10, 2014
zucchini and summer squash casserole
THIS recipe is very good. It reminds me a bit of a good egg casserole as it has that egg element in it. Mine looked better than this picture, i have to say. I think it's taken before the crumbly topping goes on. quite a few adjustments. I didn't have to cook the zucchini as long as it says and also, I cut them thicker than pictured. I used one really big green zuchini and three small/medium yellow squash. I cut down the salt and pepper by about 1/3 and added just a sprinkle of thyme (I don't love thyme). I used vitamin D milk instead of cream. I think that's all. I think it's pretty versitile :)

Tuesday, July 29, 2014
Pesto Pizza and Pesto Grilled Cheese
Mark bought a huge jar of pesto from Costco. We have made pizza with it a couple of times with our garden basil and tomatoes. I use the freezer pizza dough recipe that I already posted from this blog because it always turns out and it's easy. I just replace the pizza sauce for pesto, add shredded mozzarella, sliced tomatoes, and chopped basil. It's a favorite around here.
We have also been loving pesto tomato basil grilled cheese sandwiches around here.
We have also been loving pesto tomato basil grilled cheese sandwiches around here.
Berry Sauce
http://laylita.com/recipes/2013/02/06/strawberry-sauce/
This was so fun to try. I used it to top off baked French toast as well as used it for our crepe insides along with sour cream. So good!
This was so fun to try. I used it to top off baked French toast as well as used it for our crepe insides along with sour cream. So good!
Strawberry sauce

Easy recipe for homemade strawberry sauce prepared with fresh (or frozen) strawberries, sugar and lemon juice.
Ingredients
- 1 lb. strawberries, washed, hulled & sliced (beth used the berry mix from Costco)
- ¼ cup sugar or grated panela/piloncillo - adjust more or less to your preference
- ¼ cup water
- ½ lemon, juiced
Instructions
- Combine all the ingredients in a small pot over medium heat.
- Bring to a boil and cook over medium low heat for 20-30 minutes.
- Serve warm or cold.
Thai Chicken Wraps
http://www.melskitchencafe.com/thai-chicken-crunch-wraps/
I am always enticed by wrap recipes since I don't like sandwiches. These were pretty simple which was nice and the taste was refreshing for a wrap.
 Recipe Source: adapted from Cuisine at Home Issue 103 (used a different type of chili garlic sauce – sweet Thai – adjusted ingredient amounts, reduced mayonnaise, etc.)
I am always enticed by wrap recipes since I don't like sandwiches. These were pretty simple which was nice and the taste was refreshing for a wrap.
Thai Chicken Crunch Wraps

The cucumbers (i.e. quick pickles) can be made several days in advance. All the other ingredients can be prepped ahead of time, too, making this a super easy throw-together lunch or dinner.
Ingredients
- 1/2 cup rice vinegar
- 1 tablespoons sugar
- 1/2 teaspoon kosher salt
- 1 english cucumber, halved and cut into thin ribbons
- 1/3 cup light mayonnaise
- 2 tablespoons sweet Thai chili sauce
- 2-3 burrito-sized tortillas (white, wheat, spinach, or whatever you prefer)
- 4 leaves romaine or green lettuce
- 1-2 cups cooked, sliced chicken or turkey (beth used a can of Costco chicken)
- 3/4 cup thinly sliced or julienned carrots (1-2 large carrots)
- 1/2 cup packed cilantro leaves
Directions
- In a pie plate or other shallow dish, whisk together the vinegar, sugar and salt. Add the cucumbers, tossing to cover with the liquid. Let them stand for 10-15 minutes while you prepare the other ingredients (they can be made several days in advance and covered in the refrigerator).
- In a small bowl, combine the mayo and chili sauce. Spread a couple tablespoons evenly on the tortillas. Top with lettuce, chicken, cucumbers (lightly patting dry, if needed), carrots and cilantro (just eyeball the amounts for each tortilla depending on how many wraps you are making). Roll the tortilla up tightly like a burrito so the ends are enclosed. Serve immediately.
Printed from Mel\'s Kitchen Cafe (www.melskitchencafe.com)
Monday, July 28, 2014
Grilled Pepper Meatless Burger
Last weekend, I needed a quick meal and this is what I came up with after looking in the fridge. It turned out to be a great meal that I would love to make again. Mark got a new cast iron grill so he threw this all on the grill.
melt cheese on hamburger buns (we did mozzarella)
Grill together:
minced garlic
sliced onions
sliced mushrooms
sliced bell peppers (I used an orange and a red)
Assemble on warm buns and enjoy!
melt cheese on hamburger buns (we did mozzarella)
Grill together:
minced garlic
sliced onions
sliced mushrooms
sliced bell peppers (I used an orange and a red)
Assemble on warm buns and enjoy!
Tomato Basil Grilled Cheese
The basil in our garden has been growing wild and free this year. It has been so fun! This morning I had just been in the garden and saw a ripe tomato along with lots of basil. Then I remembered I had just finished making wheat bread. My lunch was a no brainer. I used mozzarella for the cheese.
Creamy Tex Mex Quiona Dippers
http://www.melskitchencafe.com/creamy-tex-mex-quinoa-dippers/
I was so excited to see this recipe that was a crockpot recipe and it used quinoa! It was easy and pretty good. Landon loved it too since I could just throw chunks of it on his tray and it was soft enough for him to chew. Mark used this for burrito filling the next day. I did love that don't think about how you are eating quinoa.
Recipe Source: from Mel’s Kitchen Cafe (inspired from a recipe my sister Em sent me that was more of a Ranch-style quinoa slow cooker meal; altered it to be Tex-Mex without any prepackaged seasonings)
I was so excited to see this recipe that was a crockpot recipe and it used quinoa! It was easy and pretty good. Landon loved it too since I could just throw chunks of it on his tray and it was soft enough for him to chew. Mark used this for burrito filling the next day. I did love that don't think about how you are eating quinoa.
Creamy Tex-Mex Quinoa Dippers
INGREDIENTS
- 1 pound boneless, skinless chicken breasts, cubed
- 1 cup frozen corn kernels
- 1 (15 ounce) can black beans, rinsed and drained
- 1 (14.5 ounce) can diced or petite-diced tomatoes, undrained
- 1 cup quinoa, well-rinsed and drained
- 1 cup low-sodium chicken broth
- 1 teaspoon chili powder
- 1 teaspoon cumin
- 1/2 teaspoon garlic powder
- 1/2 teaspoon onion powder
- 1 teaspoon salt
- 1/2 teaspoon pepper
- 4-8 ounces light or regular cream cheese, cubed (depending on how creamy you like it)
- Squeeze of fresh lime juice
- Handful of chopped fresh cilantro
DIRECTIONS
- In a 4- or 5-quart slow cooker, toss the chicken, corn, black beans, tomatoes and quinoa together.
- In a liquid measuring cup, whisk together the broth, chili powder, cumin, garlic powder, onion powder, salt and pepper. Pour the mixture over the ingredients in the slow cooker and give it all a good stir (scrape down any quinoa that may be stuck to the sides of the slow cooker above the liquid).
- Cover and cook on low for 6-8 hours.
- Toss in the cubed cream cheese and cover the slow cooker for 5-10 minutes to let it soften.
- Stir all the ingredients together until the cream cheese is mixed in well.
- Add the lime juice and cilantro and give it another quick stir.
- Serve warm with tortilla chips.
Red Chile Sauce Chicken Enchiladas
http://www.melskitchencafe.com/red-chile-sauce-chicken-enchiladas/
I was pleasantly surprised on this one. I didn't think I was going to like this one much when the sauce was cooking but they really were good! I loved that they were really saucy. Lucy loved them too. She asked for seconds which is unusual with her lately. We topped them with lime juice, cilantro, and sour cream.
I don't like eating just chicken and cheese for the filling so I added a little corn and rinsed black beans from a can mixed in with two chicken breasts instead of three. I also didn't want to take the time to strain the sauce like it says in the instructions. Instead I just put a little sauce in the bottom of the pan, put a little sauce in each tortilla with the chicken/corn/bean/cheese mixture and then poured it all over the top at the end. I also only used cheddar cheese. We had a anaheim chile pepper growing in our garden so I substituted that for the jalepeno. I just noticed she says you can freeze these so I am going to try to remember that.
Red Chile Sauce Chicken Enchiladas
INGREDIENTS
- 1 medium onion, chopped fine
- 1 jalapeno, seeded and chopped fine
- 1 teaspoon canola oil
- 3 medium cloves garlic, minced
- 2 tablespoons chili powder
- 2 teaspoons ground cumin
- 3 teaspoons sugar
- 2 (8-oz) cans tomato sauce
- 1 cup water
- 1 1/2 pounds boneless, skinless chicken breasts (about 3 large chicken breasts)
- 1 cup shredded sharp cheddar cheese
- 1 cup shredded Monterey jack cheese
- 1/2 cup minced fresh cilantro
- 12 (6-inch) soft corn or flour tortillas (fajita-size for flour tortillas)
- cooking spray
- salt and ground black pepper
DIRECTIONS
- In a large saucepan, combine the onion, jalapeno, 1/2 teaspoon salt, and oil. Cover and cook over medium-low heat, stirring often, until the onions and peppers have softened, 8-10 minutes. Stir in the garlic, chili powder, cumin, and sugar, and cook until fragrant, less than 30 seconds. Stir in the tomato sauce and water. Bring to a simmer.
- Nestle the chicken into the sauce. Reduce heat to low, cover, and cook until chicken is cooked through, about 12-20 minutes, depending on the size and thickness of the chicken breasts you are using. Transfer the chicken to a plate, and set aside to cool. Continue to simmer the sauce over medium heat until slightly thickened, about 5 minutes.
- Strain the sauce through a strainer into a medium bowl, pressing the onion mixture to extract as much liquid as possible. Season sauce with additional salt and pepper to taste. Transfer the leftover onion mixture from the strainer to a large bowl and set aside.
- Shred the chicken into bite-sized pieces. Add to the onion mixture in the large bowl. Also stir in 1/4 cup of the enchilada sauce, 1/2 cup cheddar cheese, 1/2 cup Monterey Jack cheese and the cilantro. Toss to combine.
- Stack the tortillas on a plate and cover with plastic wrap; Microwave on high until warm and pliable, 40-60 seconds. Spread the tortillas on a clean work surface, and spoon 1/3 cup of the chicken mixture evenly down the center of each. Tightly roll each tortilla and lay seam-side down in a greased 9×13 inch baking dish.
- Heat oven to 400 F. Pour the enchilada sauce evenly over the top of the enchiladas. Top with the remaining cheese. Cover dish with foil and bake 20 minutes, or until heated through.
- Remove foil and bake another 5 minutes, until cheese browns. Remove from oven and let stand 10 minutes before serving.
- Serve with sour cream, guacamole, salsa, additional cilantro, if desired.
NOTES
Make Ahead Instructions: Follow the recipe, letting the sauce, onions and chicken come to room temperature before assembling the enchiladas. Finish following the recipe instructions and instead of baking, cover the pan with a layer of tin foil and refrigerate for up to 12 hours. Bake covered for 20 minutes, uncover and bake an additional 5-10 minutes. Alternately, the assembled enchiladas can be covered with a double layer of tin foil and put inside a jumbo-size ziploc bag (if you don’t have a jumbo-sized bag, make sure the edges of the pan are sealed well with tin foil). Freeze for up to 2-3 months. Bake from frozen, baking for 1 1/2 hours covered at 350 degrees F. Uncover and bake an additional hour until hot and bubbly.
Friday, July 18, 2014
Buttermilk Syrup
This syrup is a great option when I am out of my other homemade syrup, or when we are in the mood for a change. It's oh, so yummy, and oh, so unhealthy. BUT it doesn't have HFCS so that's good, eh? This is also a great one for kids, cuz when you put the baking soda in, it fizzes up a bit. (like a volcano I tell them) I think somewhere it was said that this is what they use at Magelby's.
Buttermilk Syrup
Melt:
1 stick of butter
1 cup sugar
Add:
½ cup buttermilk
Simmer for 5 minutes.
Turn off heat and stir in:
1 tsp. vanilla
1 tsp. baking soda
Buttermilk Syrup
Melt:
1 stick of butter
1 cup sugar
Add:
½ cup buttermilk
Simmer for 5 minutes.
Turn off heat and stir in:
1 tsp. vanilla
1 tsp. baking soda
Loaded Veggie and Black Bean Quesadillas
http://www.thegardengrazer.com/2012/09/loaded-veggie-black-bean-quesadillas.html?m=1
 Got this recipe from Beth. These are very good and I have used this recipe to take dinner a couple of times. I grill them on my little frying pan that makes grill marks so it looks kinda fancy. I also use the uncooked tortillas. Also, I use the garlic quinoa/brown rice mix from costco instead of the rice. That make this dinner pretty darn quick to whip up.

Another tip to keep in mind, is not to over load with the mix/black beans and to make sure there's plenty of cheese. :) Just my opinion.
Vegan (with dairy-free cheese)
Gluten-free (with gluten-free tortillas)
Makes 2 large quesadillas
Ingredients
15 oz. can black beans
Tomato
Corn, about 1/2 cup (I used frozen and thawed it)
2 cloves garlic
2-3 green onions
Cooked brown rice
Shredded cheese
Cumin
4 large tortillas
Directions
Rinse and drain black beans. Chop tomatoes and green onion. Mince garlic.
Place a tortilla on a skillet. (I leave the stove turned off until assembly is complete.)
Add a layer of cheese, followed by the beans, veggies, and rice.
Add another layer of cheese to "glue" both sides together.
Sprinkle on a bit of cumin and then place the other tortilla on top.
Heat over medium for a few minutes on each side or until heated through.
Got this recipe from Beth. These are very good and I have used this recipe to take dinner a couple of times. I grill them on my little frying pan that makes grill marks so it looks kinda fancy. I also use the uncooked tortillas. Also, I use the garlic quinoa/brown rice mix from costco instead of the rice. That make this dinner pretty darn quick to whip up.Another tip to keep in mind, is not to over load with the mix/black beans and to make sure there's plenty of cheese. :) Just my opinion.
Vegan (with dairy-free cheese)
Gluten-free (with gluten-free tortillas)
Makes 2 large quesadillas
Ingredients
15 oz. can black beans
Tomato
Corn, about 1/2 cup (I used frozen and thawed it)
2 cloves garlic
2-3 green onions
Cooked brown rice
Shredded cheese
Cumin
4 large tortillas
Directions
Rinse and drain black beans. Chop tomatoes and green onion. Mince garlic.
Place a tortilla on a skillet. (I leave the stove turned off until assembly is complete.)
Add a layer of cheese, followed by the beans, veggies, and rice.
Add another layer of cheese to "glue" both sides together.
Sprinkle on a bit of cumin and then place the other tortilla on top.
Heat over medium for a few minutes on each side or until heated through.
Thursday, July 10, 2014
Quinoa Black Bean Tacos
http://damndelicious.net/2014/04/19/quinoa-black-bean-tacos/
I was pleasantly surprised on this one. Mark and I both really liked these and it was a great meatless quinoa filled meal!
I was pleasantly surprised on this one. Mark and I both really liked these and it was a great meatless quinoa filled meal!
Quinoa Black Bean Tacos

Quick, easy, healthy and full of flavor - even meat eaters will love this!
Ingredients
- 1/2 cup uncooked quinoa
- 1 (10-ounce) can diced tomatoes and green chiles, undrained
- 1/2 cup vegetable broth
- 1 teaspoon chili powder
- 1/2 teaspoon cumin
- 1/2 teaspoon garlic powder
- 1/2 teaspoon onion powder
- 1/4 teaspoon paprika
- 1/4 teaspoon cayenne pepper
- Kosher salt and freshly ground black pepper, to taste
- 1 cup canned black beans, drained and rinsed
- 1 cup frozen corn kernels
- Juice of 1 lime
- 2 tablespoons chopped fresh cilantro leaves
- 8 corn tortillas
- 1 avocado, halved, seeded, peeled and diced
- 1/4 cup sour cream
Instructions
- Heat quinoa and 1 cup water in a large saucepan over medium high heat. Bring to a boil; reduce heat and simmer until water is absorbed, about 15-20 minutes; uncover and fluff with a fork.
- Stir in diced tomatoes, vegetable broth, chili powder, cumin, garlic and onion powder, paprika and cayenne pepper; season with salt and pepper, to taste. Bring to a boil; reduce heat, cover and simmer until thickened, about 10 minutes.
- Stir in beans and corn until heated through, about 2 minutes. Stir in lime juice and cilantro.
- To serve, spoon quinoa mixture into the center of each tortilla. Top with avocado and sour cream, if desired.
Notes
Adapted from Cooking Classy
Crispy Southwest Chicken Wraps
http://www.melskitchencafe.com/crispy-southwest-chicken-wraps/
This was an easy quick one for me. I had leftover rice in my freezer that I pulled out for this and just used a can of Costco canned chicken. I skipped the cilantro because we didn't have any. I loved the sour cream cooked into the burrito.
This was an easy quick one for me. I had leftover rice in my freezer that I pulled out for this and just used a can of Costco canned chicken. I skipped the cilantro because we didn't have any. I loved the sour cream cooked into the burrito.
Crispy Southwest Chicken Wraps

Note: This is one of the most adaptable recipes on here (reading through the comments will prove that – your variations sound amazing!). Feel free to up the cilantro, add in a different meat of your choice, eliminate the pepper, add green chilies – seriously, the options are endless.
Ingredients
- 1 cup cooked rice, warm or at room temperature
- 1 cup cooked, shredded chicken (or other leftover meat, like shredded pork or beef)
- 1 can black beans, rinsed and drained
- 1 green onion, finely sliced (white and green parts)
- 1/2 red or green pepper, diced
- 1/4 cup fresh cilantro, chopped
- juice of 1 lime
- 1/2 tablespoon chili powder
- 1 teaspoon ground cumin
- 1/2 teaspoon garlic salt
- 2 cups shredded cheese (I use a combination of Monterey jack and sharp cheddar)
- Sour cream (optional)
- 6 burrito-sized flour tortillas
Directions
- Mix rice together with chili powder, cumin and garlic salt. Add remaining ingredients except for cheese and sour cream. Sprinkle cheese over tortillas, leaving 1/2-inch border around edges, then arrange chicken and rice mixture down the center of each tortilla. (Optional: I like to dollop little bits of sour cream over the cheese before arranging chicken and rice mixture down the center – it makes the wraps delightfully creamy.) Roll stuffed tortillas, leaving edges open and slightly flatten the wraps with the palm of your hand. Spray seam-side of the wrap lightly with cooking spray.
- Heat a large non-stick skillet (or griddle) over medium heat for 1 minute. Arrange wraps, seam-side down, in pan or griddle and cook until golden brown and crisp, about 2-3 minutes per side. Cooking them seam-side down first helps seal the long edge so they don’t fall apart. Transfer to a plate and repeat with remaining wraps. Serve warm.
Wednesday, June 18, 2014
Zucchini Ribbon Pasta with Creamy Lemon-Basil Sauce
This is a recipe that I have made before. I went to get the recipe on here and realized I never added it. It is a good refreshing pasta. I usually add extra lemon.
recipe from www.ourbestbites.com.
Zucchini Ribbon Pasta with Creamy Lemon-Basil SauceRecipe by Our Best Bites
Prepare a pot of water and cook pasta according to package instructions. Cut ends off zucchini and slice along the long direction, cutting the zucchini into about ⅛ inch slices. Cut each of those slices into long pieces, about the same size as the fettuccine (see photos above for explanation). Set zucchini aside.--Beth just usually fries up some zucchini and cuts it how she wants.
recipe from www.ourbestbites.com.
Zucchini Ribbon Pasta with Creamy Lemon-Basil SauceRecipe by Our Best Bites
Ingredients
½ lb (or 8 oz) fettuccine
1 medium zucchini
2 tsp olive oil, divided
10 ounces grape tomatoes (about 2 cups)
kosher salt
black pepper
3-4 cloves finely minced garlic
1 cup low sodium chicken broth
3 ounces fat-free cream cheese
1 cup very loosely packed basil, chopped
1 tablespoon fresh squeezed lemon juice, more if desired
Instructions
Prepare a pot of water and cook pasta according to package instructions. Cut ends off zucchini and slice along the long direction, cutting the zucchini into about ⅛ inch slices. Cut each of those slices into long pieces, about the same size as the fettuccine (see photos above for explanation). Set zucchini aside.--Beth just usually fries up some zucchini and cuts it how she wants.
Heat a medium size skillet to medium heat. When hot, add 1 teaspoon olive oil. Add tomatoes and give them a little sprinkle of kosher salt and a few cracks of black pepper. Cook, stirring frequently, for about 3-4 minutes. Just until they start to burst and look blistered. Remove tomatoes from pan and place in a small dish, covered, and set aside.
Add another 1 teaspoon olive oil to the empty pan and add garlic. Stir constantly on medium-low heat for about 30-60 seconds. Add chicken broth. Bring to a simmer and use a spatula to scrape any browned bits off the bottom of the pan. Simmer for 1-2 minutes and then reduce heat to low.
Place cream cheese in a microwave-safe bowl and soften for 20-30 seconds, until it can be easily stirred smooth. Ladle in a couple spoonfuls of the chicken broth mixture into the cream cheese and stir to combine. Once the mixture is smooth, add it to the pan with the remaining broth mixture and whisk until smooth and creamy. Add chopped basil and lemon juice and stir to combine. Taste sauce and season with salt and pepper to taste. (Lemon lovers can also squeeze in extra lemon juice at this point.)
When pasta is just about done, add zucchini strips to pot (so they’re cooking with the pasta). Boil for about 2 minutes, or until tender. Drain zucchini and pasta and combine with sauce. Gently toss in tomatoes, or simply add them on top of each serving. Garnish with additional basil if desired.
Serves 4 generous main dish servings, or 8 sides.
Nutrition Facts (for main dish, ¼ of recipe): 286 calories, 5 grams fat.
Nutrition Facts (for main dish, ¼ of recipe): 286 calories, 5 grams fat.
BBQ Chicken Sandwiches
http://www.tasteofhome.com/recipes/bbq-chicken-sandwiches
This is a great quick meal with ingredients I usually always have on hand. I used one can of Costco chicken to make it even easier for me. I also added one cut up red pepper. I added that at the end to each sandwich so it wasn't cooked. I liked the freshness of the addition.
This is a great quick meal with ingredients I usually always have on hand. I used one can of Costco chicken to make it even easier for me. I also added one cut up red pepper. I added that at the end to each sandwich so it wasn't cooked. I liked the freshness of the addition.
Ingredients
Wednesday, May 7, 2014
Crockpot Chicken Tortilla Soup
This is a recipe I pulled out from way back when I was first married. It is one of the easiest I have and it tastes pretty decent. I got it from Ashely Stevens but I added corn to it because I thought it needed more sustenance. I love this recipe because I usually have all the ingredients on hand and it tastes better than you would expect for how easy it is.
4 chicken breasts halves, uncooked (Beth never knows what that means---2 or 4?--I just throw in two frozen breasts from Costco that are already singly packaged)
2 15 oz. cans black beans, undrained
2 15 oz. cans mexican stewed tomatoes, drained
1 c. salsa
4 oz. can chopped green chiles
14 1/2 oz. can tomato sauce
1 can corn
tortilla chips
grated cheese
sour cream
Combine all ingredients in slow cooker except chips, cheese, and sour cream. Cover. Cook on low for 8 hours or on high for 4 hours. Just before serving, shred chicken and put back in soup. Put handful of chips in bowl then soup and top with cheese and sour cream.
Parker House Rolls-easiest so far
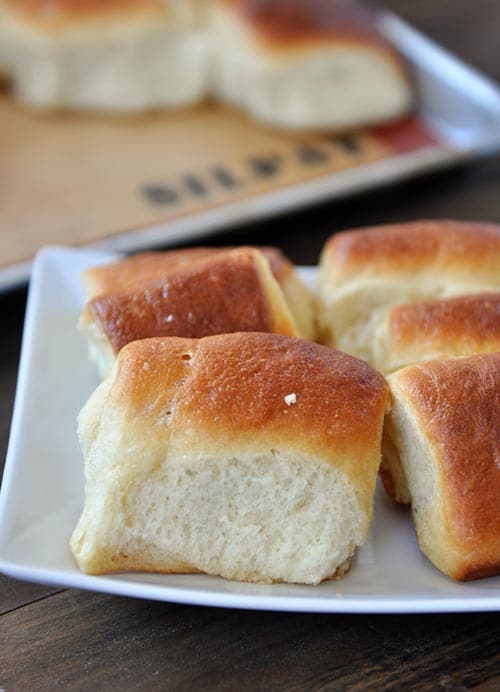 This recipe for Parker House Rolls worried me so much whenever I'd think of trying it, that I never did. Until yesterday. I took the plunge and made them.
This is from Mel's Kitchen:
Parker House Rolls
Note:
as with all yeast doughs, I never use the flour amount called for in
the recipe as a hard fast rule (unless a weight measure is given and
then I pull out my kitchen scale). Because humidity, temperature,
altitude and a multitude of other factors can impact how much flour you
need in your yeast doughs, I always judge when to quit adding flour by
the texture and look and feel of the dough rather than how much flour
I’ve added compared to the recipe. This tutorial on yeast may help identify how a perfectly floured dough should be.
Ingredients
- 2 cups hot water
- 1/2 cup granulated sugar
- 1/2 cup oil
- 2 eggs
- 1 teaspoon salt
- 2 tablespoons instant yeast
- 6 – 7 cups flour
- 1/4 cup butter, melted, for shaping rolls
Directions
- Add hot water to sugar and oil and beat with electric mixer (or by hand). Add eggs and salt; beat well. When mixture is lukewarm, add yeast and keep beating. Add flour until a soft dough forms. Do not knead. Let rise in a lightly greased, covered, bowl for one hour or until doubled.
- Divide the dough in half. Pat each portion of dough into an 9X14-inch (or so, doesn't have to be exact) rectangle. Brush with the melted butter.
- Cut the dough into three long strips (see pictures below) and then cut each strip into 6-7 sections. You'll have about 18-21 little rectangles for each half of dough (so 36-42 total rolls).
- Fold each little rectangle about a third of the way down over the butter; flip over and place seam-side down on the baking sheet. Overlap the rolls so that each roll is sitting about 1/3 of the way on top of the roll above it. I place about 6-7 rolls down the short side of a 12X18-inch rimmed baking sheet with a total of 6 rows across the length of the baking pan (the pictures below help illustrate this - it isn't as complicated as it sounds)
- Cover and let rise for 30-45 minutes. Bake at 350 degrees for 18-20 minutes. Brush tops with additional melted butter, if desired.

Despite the "do not knead" instruction that worried me so much, they turned out great! I have to admit, I did use my bosch dough hooks, and mixed a bit, which you might consider kneading, but this recipe doesn't require much kneading at all.(update12/8/15: I'd forgotten that this didnt need any kneading and i like to knead in the machine until it forms a soft dough...maybe I don't need to, but kneading doesn't hurt! they were so yummy) I have used a couple other recipes (trying to, sort of, combine Grandma Lois' and Martha Stewart's recipes) but because this simpler recipe turned out, I'll probably stick with this one. I'll have to update later though, cuz after eating one of these, Caleb asked, "Mom, when are you going to make Grandma Lois' rolls?" I told him that they WERE those rolls. and he said "exactly her rolls?" and I said, "well no, there are a few differences in shape, and few other things, ..." so even though they tasted close enough to me, maybe i can't quite forget about grandma lois' recipe just yet...
chocolate chip toffee bars
This recipe turned out to be very yummy. All I had on hand was the chocolate covered toffee bits, so I decreased the amount of chocolate chips. Also, we like milk chocolate, so I knew this would be very sweet. and it was. BUT who doesn't like sweet? I took some of these to some other people and we ate the rest. Fast.

Strawberry, Banana, Blueberry green Smoothie
I am posting this only because sometimes I forget what a basic green smoothie contains. embarrassing but true. I don't follow this exactly AT ALL. But it's good for me to have a guideline.
Ingredients
- 2 cups spinach, fresh
- 3⁄4 cup water
- 3⁄4 cup orange juice
- 1 cup strawberries
- 1 cup blueberries
- 2 bananas
Instructions
Blend spinach, orange juice and water until smooth. Next add the remaining fruits and blend again.*Use at least one frozen fruit to make the green smoothie cold.*
As a reference, here are a couple of other smoothie options too, including one from costco's.
Tuesday, May 6, 2014
Side of Fruit
some one brought this to me when I had Maylee and it was SOOO stinkin refreshing I was in love. I love how simple, yet fancy it seems. You just rinse and dry some quartered strawberries, blueberries, and halved grapes(green look good with the other colors). This time I'm doing blackberries cuz they were on sale instead of blueberries, but I don't think it matters. Spread out in foil pan (if you are taking it somewhere)or whatever you have and drizzle 1/4 honey and 2-3 Tbsp. Lime juice over the top. I like just 2 Tbsp. lime juice. Yummy!
Tuesday, April 29, 2014
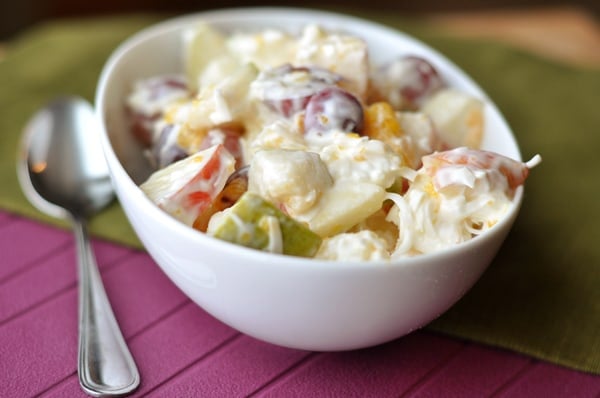
Fruit Salad with Coconut!!
I love coconut so I was excited to try this new fruit salad that looked pretty easy. I was wary of the sour cream because I didn't know if it was going to be sweet. It turned out to be sweet though with the fruit so everything was great.
http://www.melskitchencafe.com/creamy-5-cup-fruit-salad/
 Recipe Source: adapted from my sweet and wonderful mother-in-law, Diane G.
http://www.melskitchencafe.com/creamy-5-cup-fruit-salad/
Creamy 5-Cup Fruit Salad
Ingredients
- 1 (10-ounce) can pineapple chunks (about 1 cup), drained
- 1 (11-ounce) can mandarin oranges (about 1 cup), drained
- 1 medium apple, cored and chopped (about 1 cup)
- 1 cup grapes, halved
- 1/2 cup sour cream, light or regular
- 1/2 cup sweetened, shredded coconut
Directions
- Combine the fruit in a large bowl, tossing well so the apple (and other fruit that likes to brown) can get coated in the pineapple and orange juice to prevent browning. Stir in the sour cream and coconut, gently tossing to coat.
- Refrigerate for at least 4 hours prior to serving to allow the flavors to meld together. Serve chilled. You might notice that after a day or so of sitting in the fridge, quite a bit of liquid from the fruit pools at the bottom. If eating the leftovers, I like to gently pour some of this off before eating.
Roasted Asparagus
I needed a veggie for our Easter dinner so I gave these a whirl. This
is my new favorite way to cook asparagus. Just go easy on the olive oil
because if you add too much (like I found out the second time) they
don't roast and stay soggy.
http://www.melskitchencafe.com/perfect-roasted-asparagus/

http://www.melskitchencafe.com/perfect-roasted-asparagus/
Perfect Roasted Asparagus
Ingredients
- 1 pound asparagus spears (the thicker the better for roasting)
- 2 tablespoons olive oil
- Kosher/Coarse salt
- Black pepper
Directions
- Preheat the oven to 400 degrees. While the oven is preheating, gently break off the lower ends of the asparagus. This is the tough part that isn’t so great for eating. The asparagus should break naturally when you bend the asparagus about 1-2 inches up the stalk. Discard the lower, tough portion.
- Lay the asparagus in a single layer on a rimmed baking sheet. Drizzle with the olive oil. Using your fingers, gently roll the asparagus to evenly coat with the oil. Sprinkle the asparagus with salt and pepper. Again, lightly roll the asparagus so the salt and pepper gets evenly distributed.
- Bake for 10-12 minutes, checking often the last one to two minutes of baking, until the asparagus is tender when pierced with a fork. Serve immediately.
Subscribe to:
Comments (Atom)